
Are you looking to enhance your multi-account management with an additional layer of security and privacy? Integrating UnoProxy with AdsPower browser provides the perfect solution for users who need reliable proxy protection while managing multiple online profiles. UnoProxy offers premium residential and datacenter proxies that ensure seamless browsing experiences without compromising on speed or security.
In this comprehensive guide, we'll show you exactly how to configure UnoProxy within your AdsPower browser, enabling you to operate multiple accounts safely and efficiently while maintaining complete anonymity.
Why Choose UnoProxy with AdsPower?
Superior Proxy Performance – UnoProxy provides both residential and datacenter proxy options, giving you flexibility for any project requirements
Global Coverage – Access geo-restricted content with proxies from multiple countries and regions worldwide
Enhanced Security Framework – Combine AdsPower's advanced fingerprint management with UnoProxy's secure proxy network for maximum protection
Cost-Effective Solution – Enterprise-level proxy features at competitive, transparent pricing
24/7 Reliability – Enjoy consistent uptime and responsive customer support whenever you need assistance
Step-by-Step Configuration Guide
Step 1: Create a New Browser Profile
-Launch your AdsPower application and click on "New Profile"

-Enter a descriptive name for your profile in the Name field
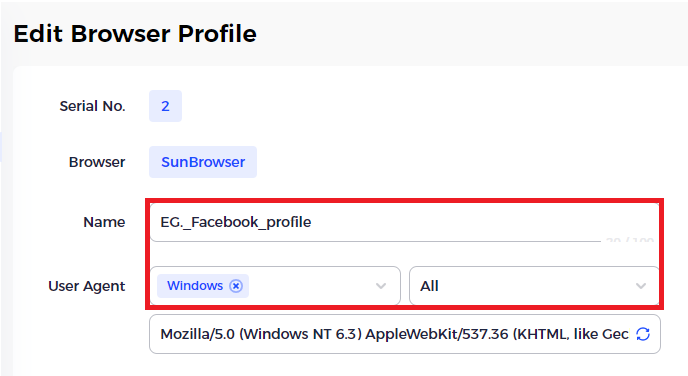
-Select your preferred device type from the User Agent dropdown menu
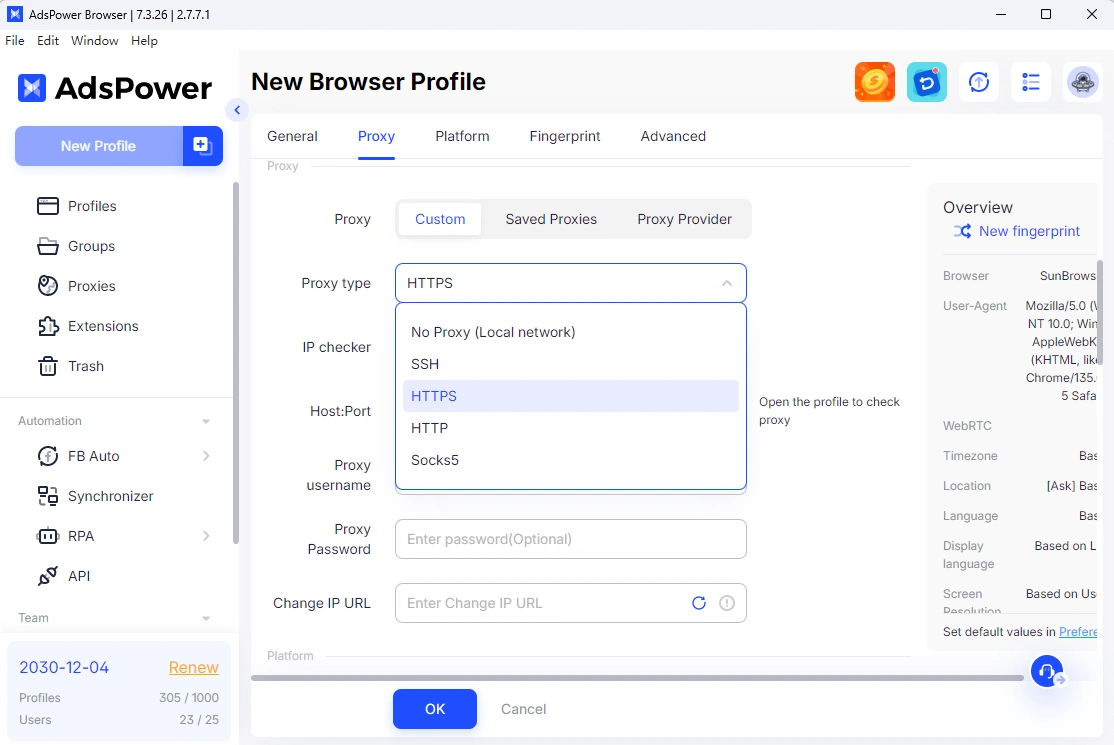
Step 2: Configure UnoProxy Settings
-Navigate to the Proxy Settings section within the profile setup
-Choose the proxy type as your proxy protocol shows
-Enter your UnoProxy credentials in the following fields:
- -Proxy Type: HTTP/HTTPS based on your selection
- -Proxy Host: Input your UnoProxy endpoint address
- -Proxy Port: Enter the port number provided by UnoProxy
- -Proxy User: Your UnoProxy account username
- -Proxy Password: Your UnoProxy account password
💡 Pro Tip: You can generate your unique endpoint address and port details directly from your UnoProxy dashboard, where you can also select your preferred location, session type, and output format.
Connection Verification:
- -For HTTP protocols: Click "Check Proxy" to immediately verify your connection
- -For HTTPS protocols: Test your connection after launching the profile
Step 3: Complete Profile Information
-From the Account Platform dropdown, select the website you intend to access with this profile
-Enter your login credentials for automatic sign-in when launching the profile
-Configure any additional fingerprint settings in the Advanced section based on your specific needs
-Click OK to save your profile configuration
Step 4: Verify Proxy Connection
-Navigate to the Profiles tab in AdsPower
-Click "Open" to launch your newly created profile
-The browser will automatically open with a verification tab showing your proxy IP address and connection status
-Test connectivity with sample websites to ensure everything works properly
📝 Important Note: Some websites might appear inaccessible due to specific proxy restrictions. If you encounter blocked sites, simply contact UnoProxy support for prompt assistance and resolution.
Final Thoughts
Congratulations! You've successfully configured UnoProxy with your AdsPower browser. This powerful combination enables you to:
- Maintain complete online anonymity and protect your digital identity
- Safely manage multiple accounts across various platforms without detection
- Scale your operations with confidence using reliable proxy infrastructure
- Access geo-restricted content and markets with ease
- Optimize your workflow with seamless integration between both platforms
👉 Ready to enhance your browsing experience?
Sign up for UnoProxy today and discover how our premium proxy service can transform your multi-account management strategy with secure, flexible, and efficient browsing capabilities.
